Getting started · Placket 1.0.0
Getting started
Last updated: November 2, 2026
This page walks you through installing Placket, opening the theme editor and setting up your store. You do not need to write code.
Before you begin
- You need a Shopify store on any paid plan, or a development store.
- Have your logo, a few product photos and your policy text ready.
- Work on an unpublished copy of the theme first. Publish it when you are happy.
Install the theme
- Open the Placket listing in the Shopify Theme Store.
- Pick a preset: Placket (everyday womenswear) or Bodice (dark evening wear). See Presets.
- Select Add theme (or Try theme to preview first), then choose your store.
- In your admin, go to Online Store > Themes. The theme now appears in your theme library, not yet live.
You can add both presets. Each one becomes its own theme in your library.
Open the theme editor
- Go to Online Store > Themes.
- Next to Placket, select Customize.
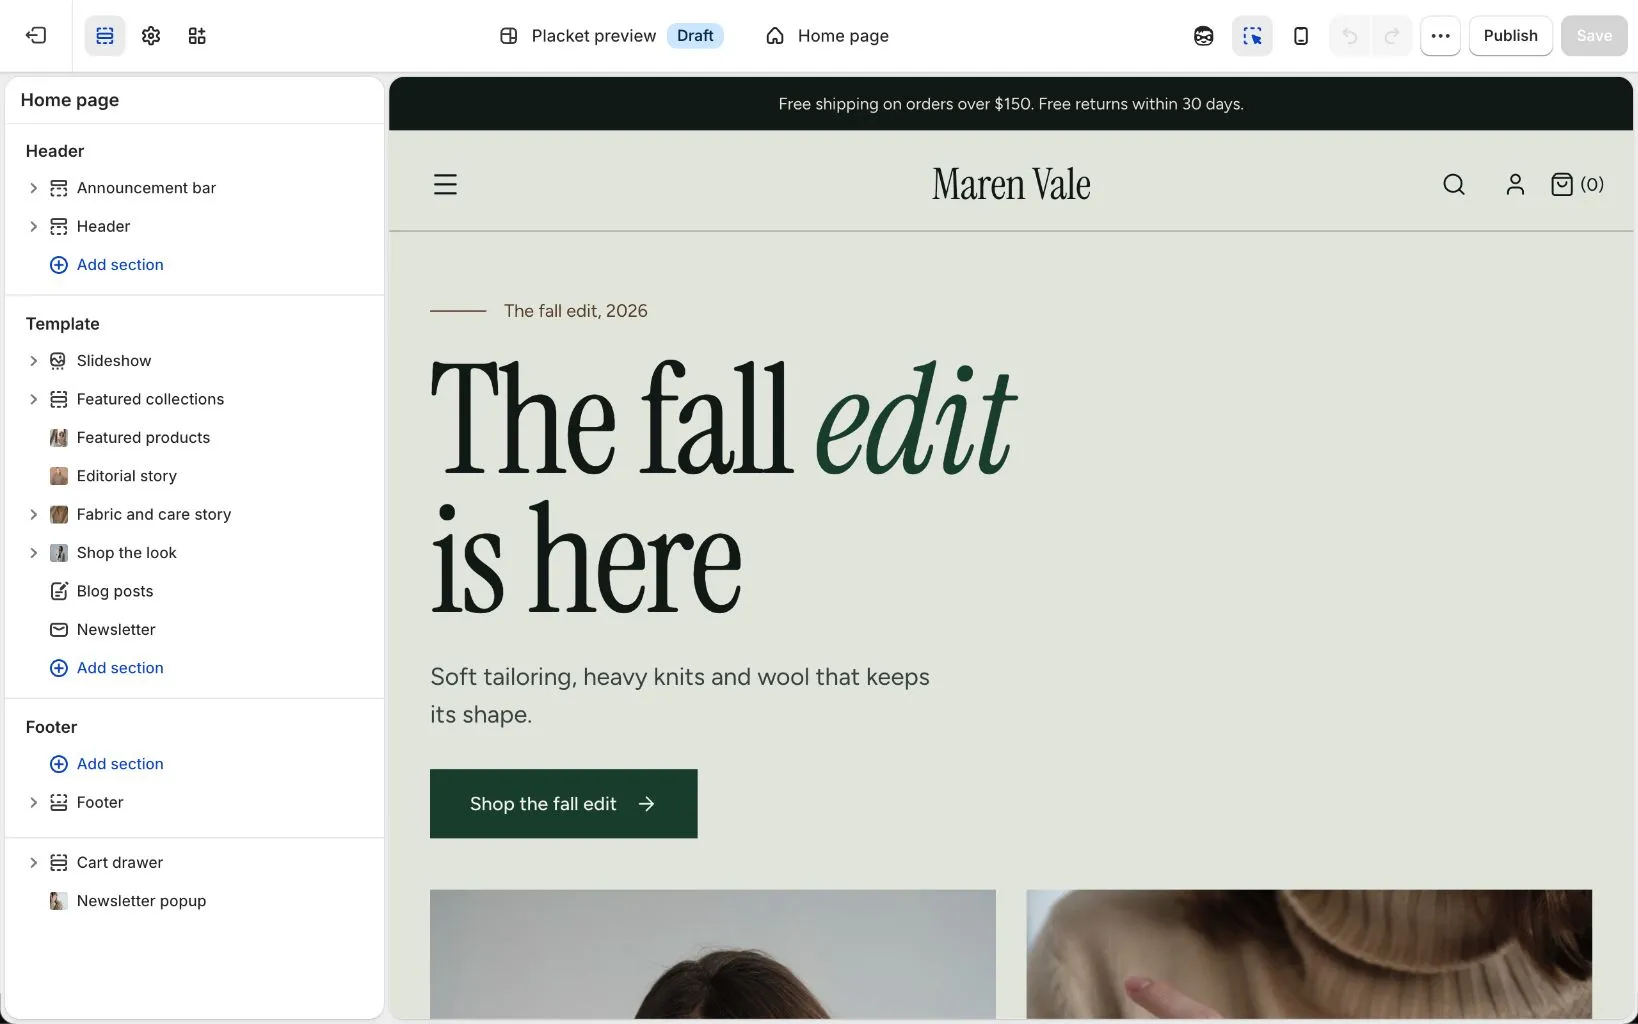
The editor has three main areas:
- Left bar. Sections and blocks of the current page, plus Theme settings (paintbrush icon) and App embeds.
- Top bar. The page picker (Home page, Products, Collections, Pages and so on), the device preview buttons and Save.
- Preview. The live page. Select anything in it to jump to its settings.
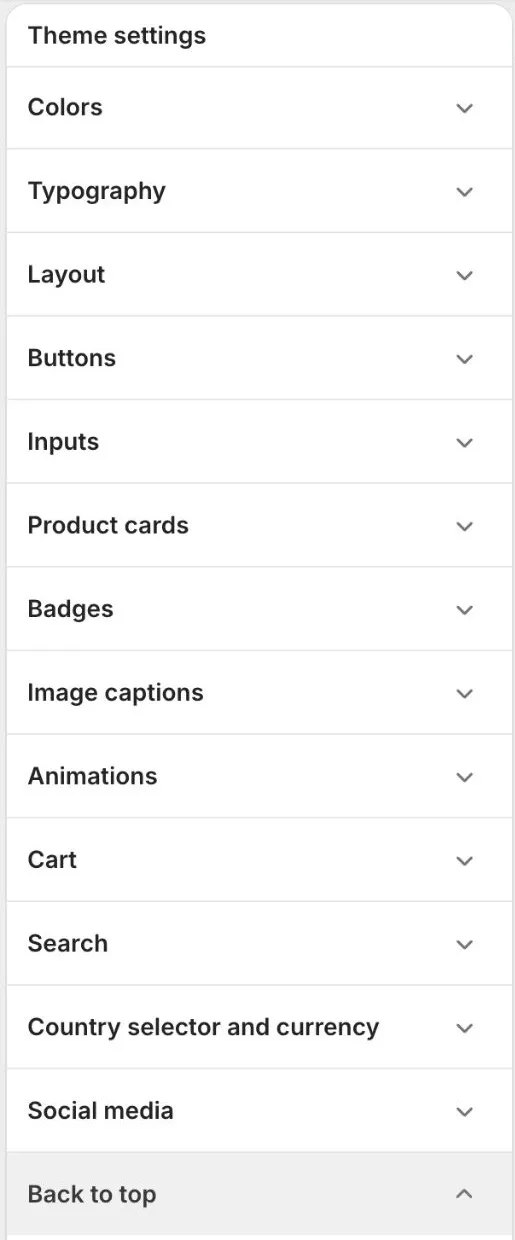
Select the paintbrush icon in the top bar to open Theme settings. The settings are grouped, and each group opens when you select it:
First steps checklist
Work through this list in order.
- Add your logo. In the editor, open the Header group and set Logo image in the Header section. Leave it empty to show your store name as text. See Header.
- Set your colors. Open Theme settings > Colors and adjust the five color schemes. See Theme settings.
- Choose fonts. Open Theme settings > Typography. See Theme settings.
- Create your menus. In your admin go to Online Store > Navigation. Edit
main-menuandfooter. See Navigation and menus. - Set up the home page. Open the Home page in the editor. Replace the sample text and images in each section. Add, remove or reorder sections. See Sections reference.
- Add products and collections. In your admin add products (Products) and collections (Products > Collections). Fill the product images with alt text. See Performance and images.
- Set up product extras. Fill the product page content in Customize: tabs, highlights, fit notes, size tables and Complete the look products. Text for one product goes in the product description. See Product content.
- Set up filters. Install the free Shopify Search & Discovery app and add filters. See Filters and search.
- Add your social links. Open Theme settings > Social media.
- Set the cart. Choose drawer or page, and set a free shipping threshold if you want one. See Theme settings > Cart.
- Add pages. Create Contact, FAQ, Size guide and any other pages in Online Store > Pages, and pick the matching theme template for each. See Page sections.
- Check markets. If you sell in more than one country or language, see Translations and markets.
- Add your favicon. Open Theme settings > Favicon.
- Preview on a phone. Use the device buttons in the editor, then open your preview link on a real phone.
- Publish. In Online Store > Themes, select Publish on your theme.
Good habits
- Select Save often. Changes are not live until you publish the theme.
- Use Actions > Duplicate in Online Store > Themes to make a backup before big changes.
- The demo content (brand names, text and photos) is sample content. Replace all of it with your own.
- Test checkout with a test order before you launch.
Where to get help
See the FAQ first. If you still need help, see the support policy.